SOPHIE TANKINI : : MY TIPS AND TRIBULATIONS : : CLOSET CASE FILES
Well hiya everyone.
As most of you know, one of my versions of the Sophie Swimsuit is a tankini. I’ve written this post for those of you that have expressed an interest in making your own tankini. Hopefully, it will help you out, if even just a little. See…the thing is…I’m not 100% happy with my second Sophie Tankini. It’s not a complete fail; I went for a swim yesterday and it was comfortable enough…but..I just haven’t managed to get the fit quite right. Hence, my reluctance to label this post as a DIY or a tutorial….or anything else that even remotely alludes to me having any sewing skillz whatsoevah. It’s, at best, a dialog explaining my process. And….obviously…my process isn’t perfected or I’d be singing a happier tune.
My goal has been to make a sleek, fitted tankini…a silhouette much like the one piece. Unfortunately, it isn’t as simple as cutting off the one piece at the hipline and sewing a hem. The pattern, like most swimsuit patterns, is designed specifically for four-way stretch fabric. When you wear the one piece suit, the fabric stretches in all directions. It stretches around your body horizontally and it also stretches lengthwise from top to bottom. When you cut off the bottom of the suit, the fabric no longer has the resistance required for it to stretch from top to bottom. Am I making sense? It will still stretch around your body but without that four-way stretch, the hemline will be ride up above your waistline in a wrinkly mess…not the sleek look I’m going for…
The solution trick is to add width to your pattern. How much is the right amount, you ask? Eep…I’m sorry….I don’t have the definitive answer. It really will depend on your body and your fabric. Having said that…I will be sharing the formula I used.
Tip: The flouncier you like your tankinis, the easier it will be. A fitted tankini with the seam lines matching….more challenging.
1. The first step is to trace off front, side front, back and side back pieces. It’s at this stage that I determined how long I wanted my tankini. I drew a hemline beginning at the side seams and about 1″ from the bottom of the one piece side back and side front pattern pieces.
2. I then slashed the pattern pieces being mindful not to distort the cup shape. I was also careful not to slash the back pieces above the point where I attached the wings. Each of my revised pattern pieces are 20% wider as measured at the bottom hemline. In addition, on this make, I added 1/4″ to my side seams in the midriff area. And this I didn’t do, but highly suggest….make your seam allowances wider than 3/8″…this will give you some valuable wiggle room when it comes to fitting your tankini.
3. The finished pattern pieces…retraced just for you. You can see I opted for a slightly hi/low hemline.
Tip: If you want the side front and side back seams of your tankini to line up with the seam lines on your bottoms…advisable if you are using two different fabrics…then I recommend that you complete your swimsuit bottoms first. Then you can baste the side front/side back tankini seams and try on your suit, making adjustments as necessary.
4. My hems are sewn with a twin needle and woolly nylon thread in the bobbin.
5. Cut 3/8″ wide strips of fusible knit interfacing.
6. Working on the wrong side of the fabric, fuse strips of interfacing to the bottom hem of your tankini. Note: lycra and heat…not really intended for each other. Be sure to test a sample if you use this method. I do not use my steam setting to apply the interfacing. I lay a damp press cloth over top of the interfacing and use a dry iron set on medium-high heat.
7. After applying interfacing, I edge finished with my serger, which is entirely optional, then folded the hem 3/8″ and topstitched with a twin needle.
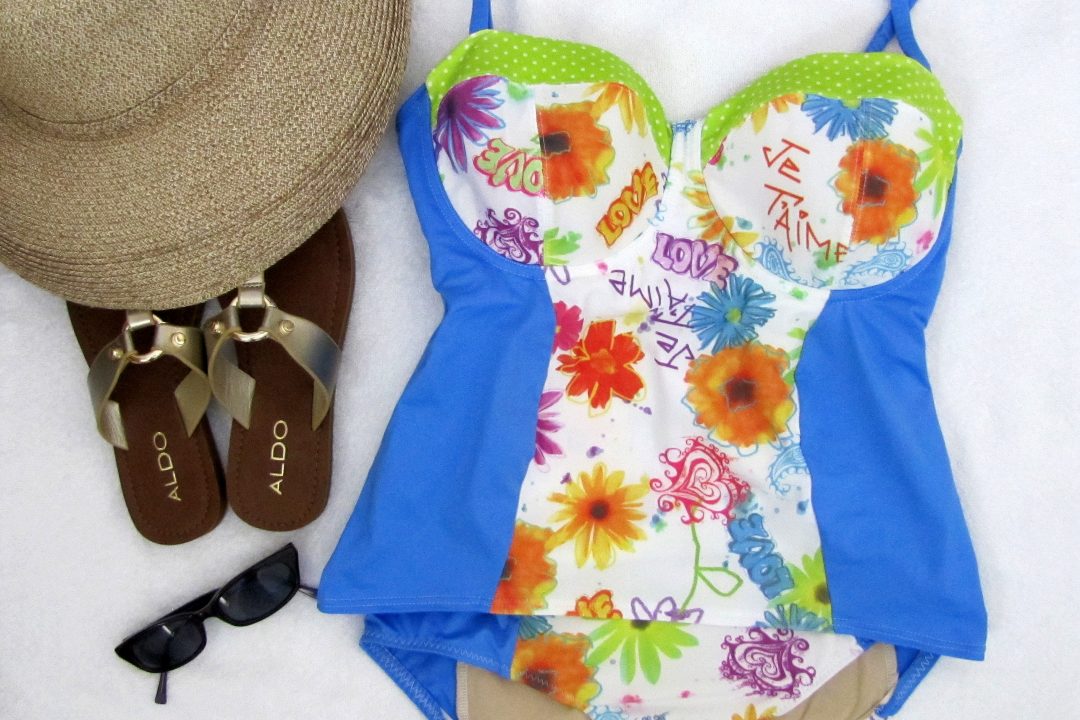
13. The swimsuit I just finished and photographed for this post. Even with adding to the side seams, it appears wrinkly….actually more wrinkly than my pink tankini….so….um….yeah…I dunno. The fabrications are quite different in weight and I can only imagine that is part of the equation.
So….to sum up…I hope these tips are of help to you. As you can see, there is a degree of experimentation that is required. I think I will add 25% to my pattern pieces on my next make and 5/8″ wide seam allowances…just to be sure I’ve given myself enough room to really master the fit.
And between you and me…..I think I might just give the two piece a go…gasp. The bottoms are supremely comfortable and have a very high rise. It would just be the tiniest bit of midriff showing…Never say never, amirite? Hope you’re all enjoying summer!
My DIY Sophie Swimsuit Mashup : : here
My Sophie Swimsuit Post : : here


30 Comments
Thanks, Sue! Very helpful. One day. When I get around to it. Hope you make the two-piece! I'm sure it will be very cute on you.
I have the same thought… I was thinking about giving the two piece a go, and I don't do bikinis! But I'm also thinking about trying your modified one piece with a band. For the tankini, maybe add width in the hips, the wrinkles might be caused by the suit getting hung up there.
Ah…like minded. Yes thanks…my next tankini will have some more ease.
Very clear explanation! Thank you for sharing with us. Hope one day I will make tankini 🙂
My pleasure to share Hana. I'm sure when, or if, you do make a tankini it will be very cute.
Thank you for the clear and well explained process,
Happy it has made some sense to you Sharon!
What a lot of work, what a skills you have (yes you do). And in spite of the nice tankinis my favourite is also 11, the swimsuit.
After all this explanation I am sure I will never make one myself. Just kidding, I already knew that 40 years ago haha.
Greetje
LOLOLOL….you're funny Greetje.
Thanks for this Sue! You are so, so talented. And just like Greetje, I know I will never attempt – but I admire! xox
Patti
http://notdeadyetstyle.com
LOL…you two, double trouble I say…..now to one day get myself to your Florida beaches.
A lot of interesting points here, things that I wouldn't have thought about. I do like the idea of cutting it large with the 5/8″ seam allowances, gives you plenty of room to tailor it. You can always take it in, but once you cut, you can't put it back!
I say go for it on the 2 piece!
Thanks for the encouragement. I'm pretty sure I will make one…a two piece that is.
I think you could totally pull the two piece off. This tankini discussion is very interesting – I would have never thought about the effect of the 4 way stretchI think you are right that it takes some trial and error and is probably up to some personal preference too. I really need to get on this bathing suit making train. Tankini issues aside, I think all your suits look great!
Thanks Heather. Yes, personal preference plays a strong factor. The ready made tankini I have just skims my body….and I like that.
Yes….you be a busy gal with the road trip and all…
Your talent never ceases to amaze me!
Shirl
I say that everytime I see/read your art too Shirl!
Is it possible that there is too much length there at the back creating those wrinkles? it kinda looks like if you just (haha – *just*… it's never that simple, is it?) took out a little wedge of fabric from the back bodice before attaching your strap modification (almost like a sway back adjustment) those wrinkles would disappear. maybe??
Whatever you do next, I am quite certain that you will end up with a suit you are 100% pleased with before you're finished 🙂
Tracy
You know…that just might be the answer Tracy!!!! THANK YOU! Either at the top where I attach it to the wing, but possibly even at an invisible 'lengthen or shorten here' line a few inches below where I attach the wing! Brilliant! Thanks again!
Those gorgeous cheerful, summer-tastic fabrics you have chosen; honestly these are my favourites of all the sophie swimsuits I've seen, ever. Including mine! LOVE!!!
Aw…thank you so much Carolyn! I have a piece of red/white/and blue fabric that is begging to be sewn up. I'm hoping the finished suit will look more classic!
I think you are so amazing! I can't imagine how much work it would take to make a tankini. So many things to take into account. Love your choice of pattern and colors. Even though you may not be 100% satisfied I think it looks fantastic.
Rebecca
http://www.winnipegstyle.ca/blog/
Thank you Rebecca! I'm always in awe of the creativity that goes into your outfits!
huh? I must be in post-doc. sewing school.
Well, how many swim suits do you have now, Ms. Sue? Not that that's the point. That would be like asking someone how many dresses (or shoes) they have now. hrumph.
LOL…'nuf with all this ed-u-ca-shion stuff, amirite? After making my swimsuit mashup, the feedback was strongly in favour of tips and how-to's so it's done!
Yes…how many dresses doth one have in one's Chicago wardrobe Pao? hehehe…I can confidently say I have too many bathing suits, so why do I have the urge to make 'just one more'?
Because you just gotta get it pefect, I mean right. Right? Right.
Now, can we see them all in a chorus girl like line up…
Thank you so much for your tips. I couldn’t manage to make my own swimwear but maybe next year with your helpful tips!
For the tankini top – I made mine using a workout style tank top (a very old Simplicity pattern) . For the original, I just wore a bikini top underneath for bra-like support; my remake will have a built in bra (once I get over the fear of doing that, and actually make the thing). If you want to keep the cups of this swimsuit, but have a nice skimming fit through the torso, compare this tankini pattern to a good tank top pattern, and test out if that works better.
Now that’s a great idea. I’ve recently made the Kila Tank and I find it fits really well. You’re right…I could use that pattern for the torso part of the suit. That being said…I admit that I’m really fond of my one piece suits. 🙂 More so than the tankini versions. But…just thinking aloud here…I bet I would like a tankini better if I made it with a workout style tank top like you have done. I already have the Sewaholic top and that it has a built in shelf bra. Thanks for the suggestions!